There are many video’s and blog posts about how to upgrade your 2009 iMac’s internal disk, but this is my version; it’s simpler and you’re gonna need a chopstick.
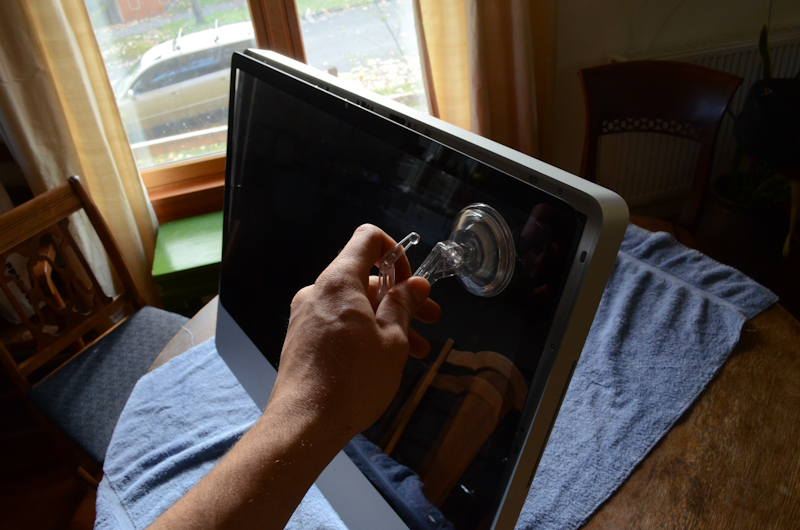
Use a suction cup to remove magnetically connected screen cover.

Remove the RAM cover.

Carefully remove outer metal frame. Delicately wiggle it off. Careful, there are wires attached at the top.
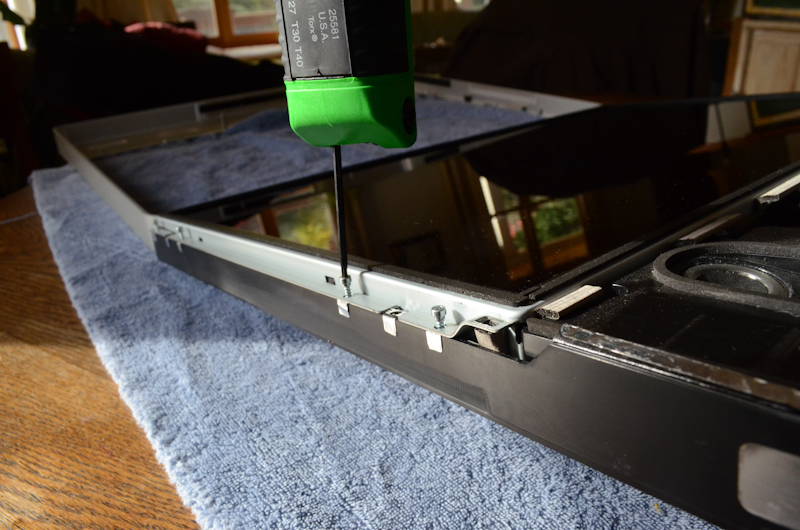
Remove the screws with your torx screwdriver. Size 8, I believe.
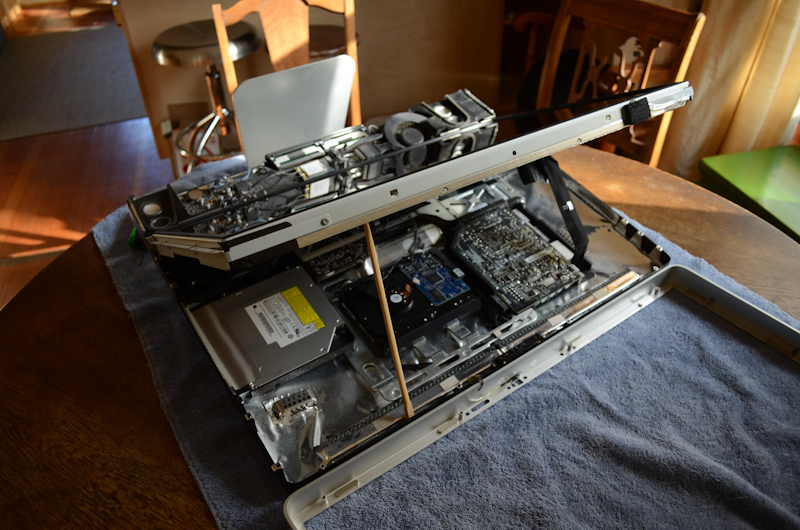
Gently pry the LCD away from the top of the monitor. Insert your chopstick as if you're propping up your car hood. Note that you will have to peel some adhesive away from the LCD backing. This is normal.
Pop open that thingy, that plastic mold hiding the screws. It's stubborn and pivots on your left.
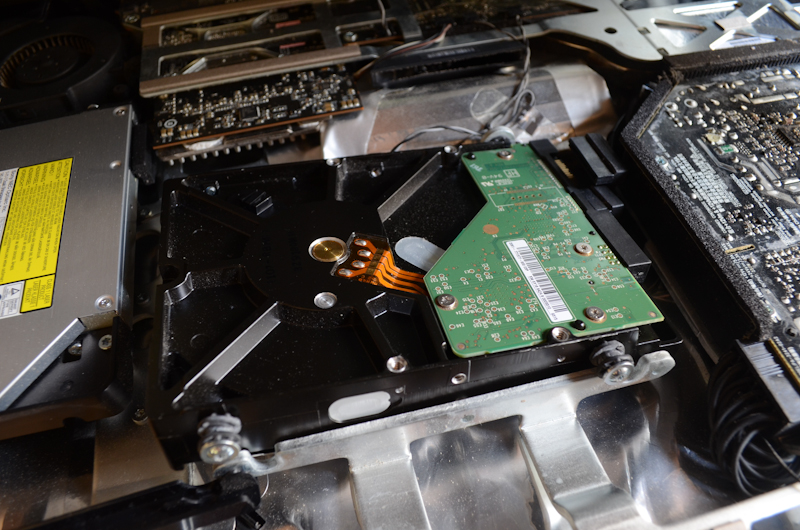
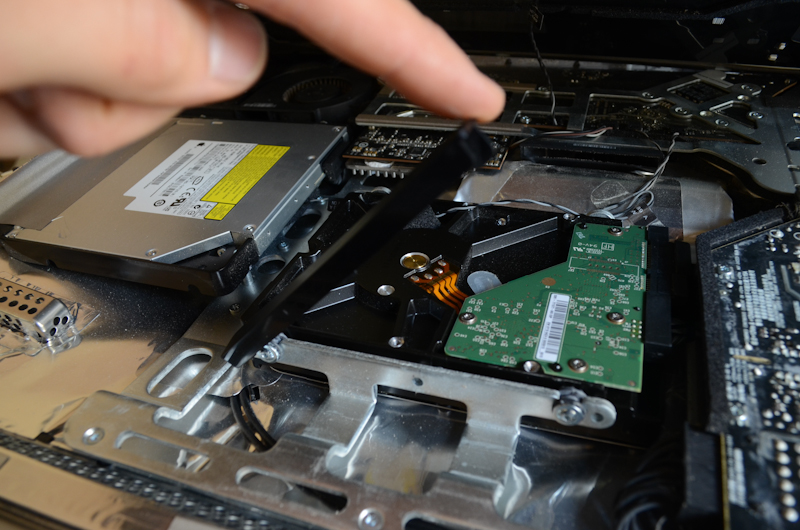
After loosening the screws, disconnect the power and data cables.

Remove the screws and rubber shocks from old disk and put on new disk. Note orientation.
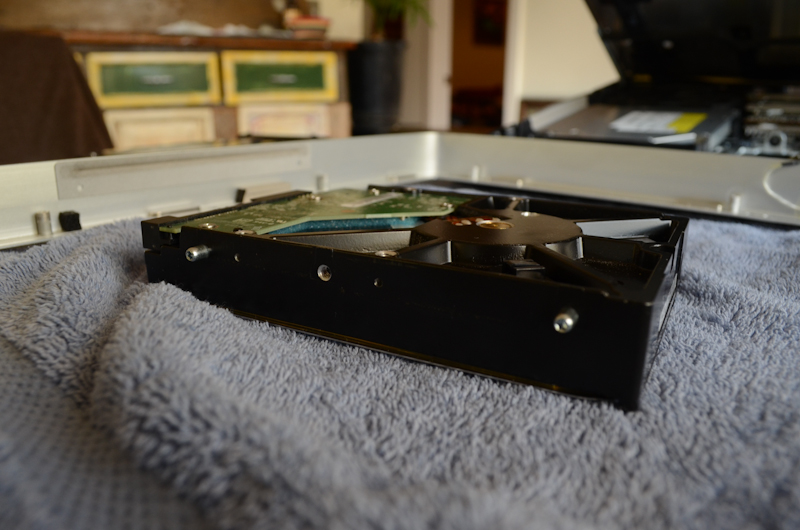
Remove torx pivot screws from old disk and afix to new disk. Note orientation.

Install new disk. Note orientation. Plug in both cables and afix the heat sensor.
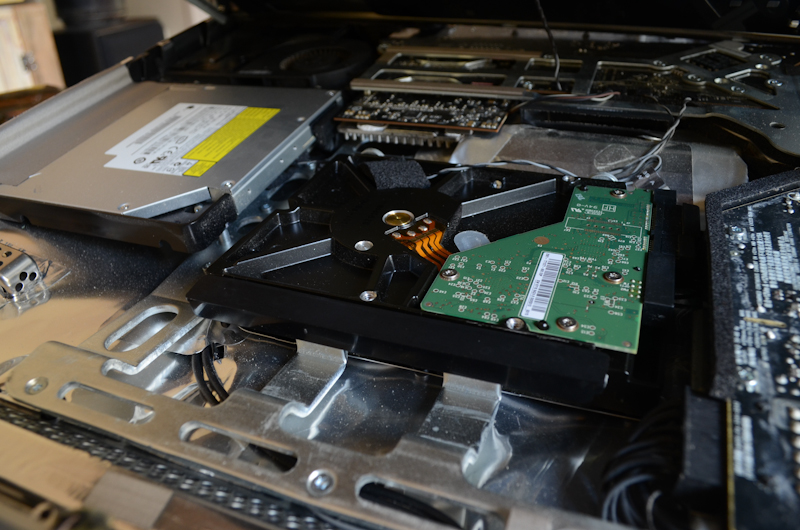
There you have it. Your new sexy drive.
At the time I did this, I did not have the necessary size 6 torx screwdriver to remove a particular cover at the base of the LCD. So I was unable to disconnect the LCD cable and therefore had to do the surgery without removing the LCD. That step concerned me anyways and I’m pleased that I didn’t have to take it all apart. Be careful, however, not to bump the chopstick. Happy upgrading!
Disclaimer: Proceed at your own risk. This information is being offered “as is” and I will not be held responsible for the accuracy of this information nor any damage that results from the use of this information.
Leave a Reply