Just Learned About FCPX Roles for Exporting Media

Working on a quick music video of mine, I needed to do some scrubbing on just the audio track. After detaching the audio I tried copy and paste, as that works in Logic Pro 8 and 9, but that didn’t work in Final Cut.

Fine, I said.

Then, after a quick Google search (‘final cut pro x export audio to logic’) I stumbled upon the concept of Roles. I’m so new to video editing I’m sure the nomenclature makes sense to you guru’s but I would have never thought of that. Yes, Bob, I have an idea. If someone want’s to export different sections of a FCPX project for processing elsewhere (video, audio, etc.) let’s not call it Export let’s call it Roles. Right… I digress.

Anyways, thanks to this quick post for the know-how. I see I used quick a lot. Must be the green tea I decided to drink this evening.

Posted in: Video Production  |  Tagged with: ,  |  Leave a comment

Sharing Custom Compressor 4 Settings Between Computers

I recently needed to share a custom Compressor 4 setting from one Mac to another. It’s pretty simple, yet, I don’t understand why there’s no import / export feature to accomplish this. On source computer navigate to /Users/username/Library/Application Support/Compressor and copy the .setting file or files to the same location on the new computer.

Thanks to this post for the information.

Posted in: Video Production  |  Tagged with: ,  |  Leave a comment

If You Own Logic Studio, You Own A Quicktime Pro 7 License

Yes, a Quicktime Pro 7 license comes with Logic Studio. I stumbled upon this because the Quicktime 7 ‘pro’ features on my new Macbook Pro were disabled. I had yet to install Logic Studio. Once I did, it unlocked everything. That’s it. Hope this saves you some huffing and puffing.

Download Quicktime Pro 7 for OS X Lion here.

Posted in: Sound Engineering  |  Tagged with: , , ,  |  Leave a comment

This also includes beaming

I was signing up for a new twitter account this evening, and their terms of service state:

[...] you grant us a worldwide, non-exclusive, royalty-free license [...] in any and all media or distribution methods (now known or later developed).

So this also includes beaming content. And I’m not talking digitally, asshole. I’m talking real Star Trek shit. Alas, beaming is probably digital too. Just really small zero’s and one’s.

Posted in: Uncategorized  |   |  Leave a comment

jQuery Templates, Test for Undefined JSON Variable

I needed to test for an undefined JSON variable today. It’s pretty simple.

{{if ImageUrl }}
<img src="${ImageUrl}" alt="${ImageAltText}" title="${ImageTitle}" />
{{/if}}

I found the answer in the comments on the jQuery template {{if}} tag page: http://api.jquery.com/template-tag-if/

Posted in: Development  |  Tagged with: ,  |  Leave a comment

Favorite terminal command in Lion

A favorite terminal command on Lion:

defaults write com.apple.Finder AppleShowAllFiles YES

And of course its opposite:

defaults write com.apple.Finder AppleShowAllFiles NO

Thanks to this guy for the tip.

Posted in: Development  |  Tagged with:  |  Leave a comment

DIY: 2009 iMac Internal Disk Upgrade

There are many video’s and blog posts about how to upgrade your 2009 iMac’s internal disk, but this is my version; it’s simpler and you’re gonna need a chopstick.
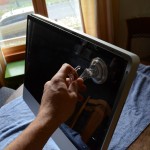
Use a suction cup to remove magnetically connected screen cover.
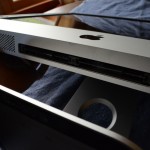
Remove the RAM cover.
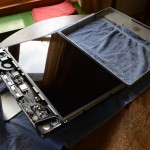
Carefully remove outer metal frame. Delicately wiggle it off. Careful, there are wires attached at the top.
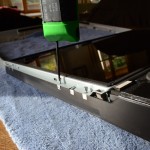
Remove the screws with your torx screwdriver. Size 8, I believe.
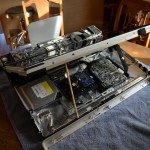
Gently pry the LCD away from the top of the monitor. Insert your chopstick as if you're propping up your car hood. Note that you will have to peel some adhesive away from the LCD backing. This is normal.
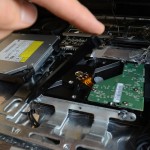
Pop open that thingy, that plastic mold hiding the screws. It's stubborn and pivots on your left.
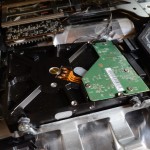
After loosening the screws, disconnect the power and data cables.
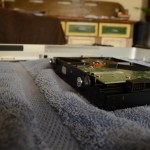
Remove the screws and rubber shocks from old disk and put on new disk. Note orientation.
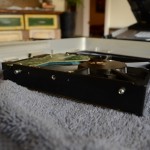
Remove torx pivot screws from old disk and afix to new disk. Note orientation.
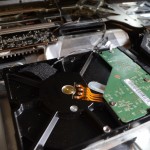
Install new disk. Note orientation. Plug in both cables and afix the heat sensor.
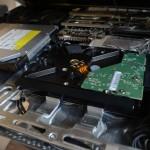
There you have it. Your new sexy drive.

At the time I did this, I did not have the necessary size 6 torx screwdriver to remove a particular cover at the base of the LCD. So I was unable to disconnect the LCD cable and therefore had to do the surgery without removing the LCD. That step concerned me anyways and I’m pleased that I didn’t have to take it all apart. Be careful, however, not to bump the chopstick. Happy upgrading!

Disclaimer: Proceed at your own risk. This information is being offered “as is” and I will not be held responsible for the accuracy of this information nor any damage that results from the use of this information.

Posted in: Hardware  |  Tagged with: , , ,  |  Leave a comment